Posts in Category: how-to


Engine On Signal Via Ford Transit Vehicle Interface Connector
Our house batteries can be charged via 2 sources, the 270 W solar panel on our roof or via the vehicle’s electrical system. When charging via the vehicle’s electrical system we didn’t want to accidentally discharge the starter batteries to the point that the van wouldn’t start. We needed a way to turn off the house battery charging circuit when the engine was off. We also wanted the ability to use one of the upfitter switches to manually disable charging even if the engine was on. To accomplish this we needed a positive switched engine on signal.
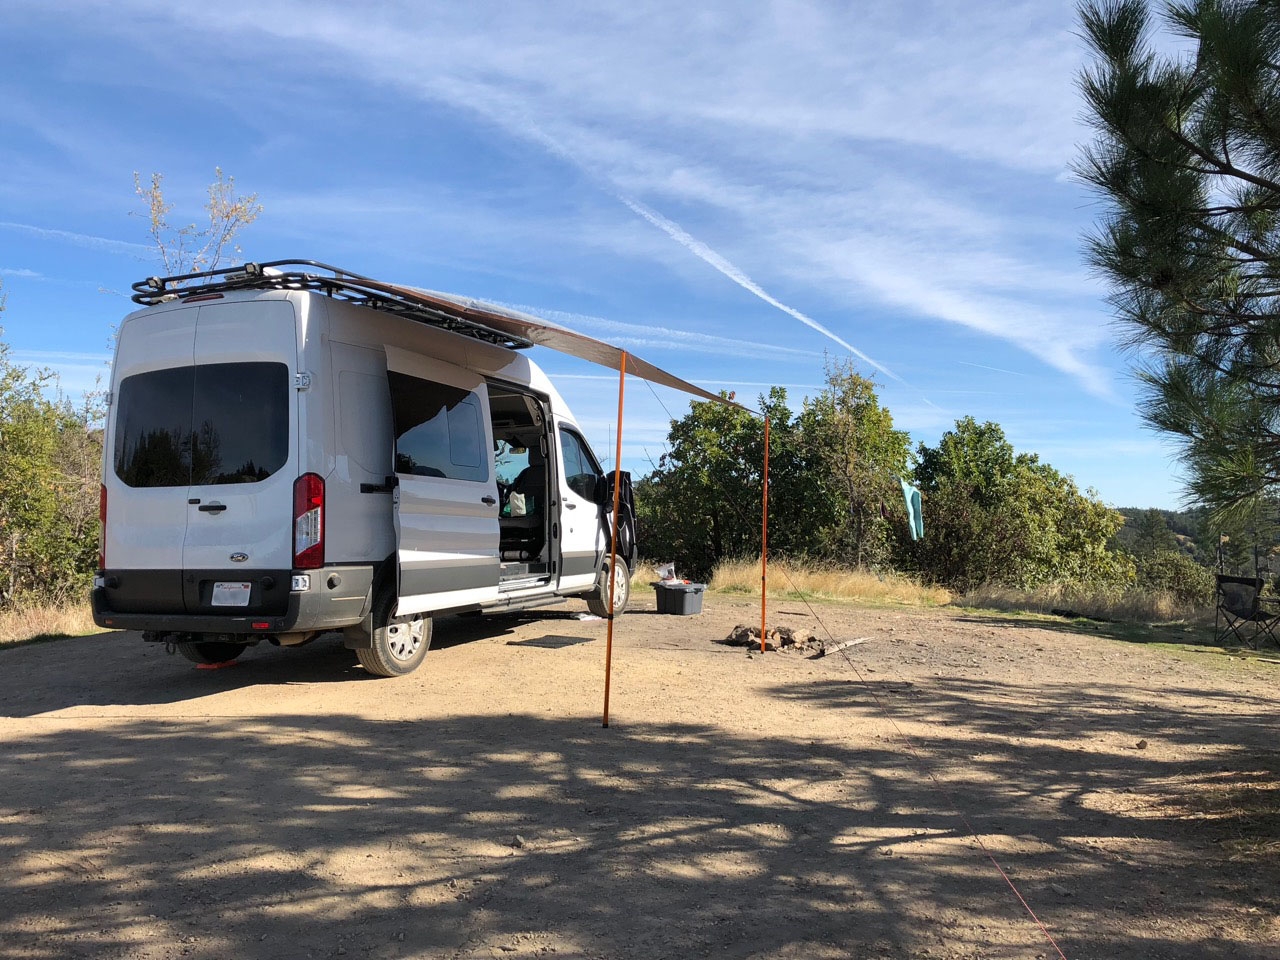

Affordable DIY Van Awning
We planned on getting a Fiamma F45 S awning for Gidget, we even bought the special mounts from Aluminess to mount it, but after going on a few trips now we’re not so sure anymore. At a cost of around $1000 the Fiamma awning is expensive enough to make us think twice about it.
For the type of adventuring we do, always on the move seeing sights, we don’t tend to set up camp in anyone spot for very long. And if we do park it for a few days, a quick deploying awning isn’t crucial.
At about $140, our DIY awning can be deployed in about 15 minutes and cost significantly less than the Fiamma option.
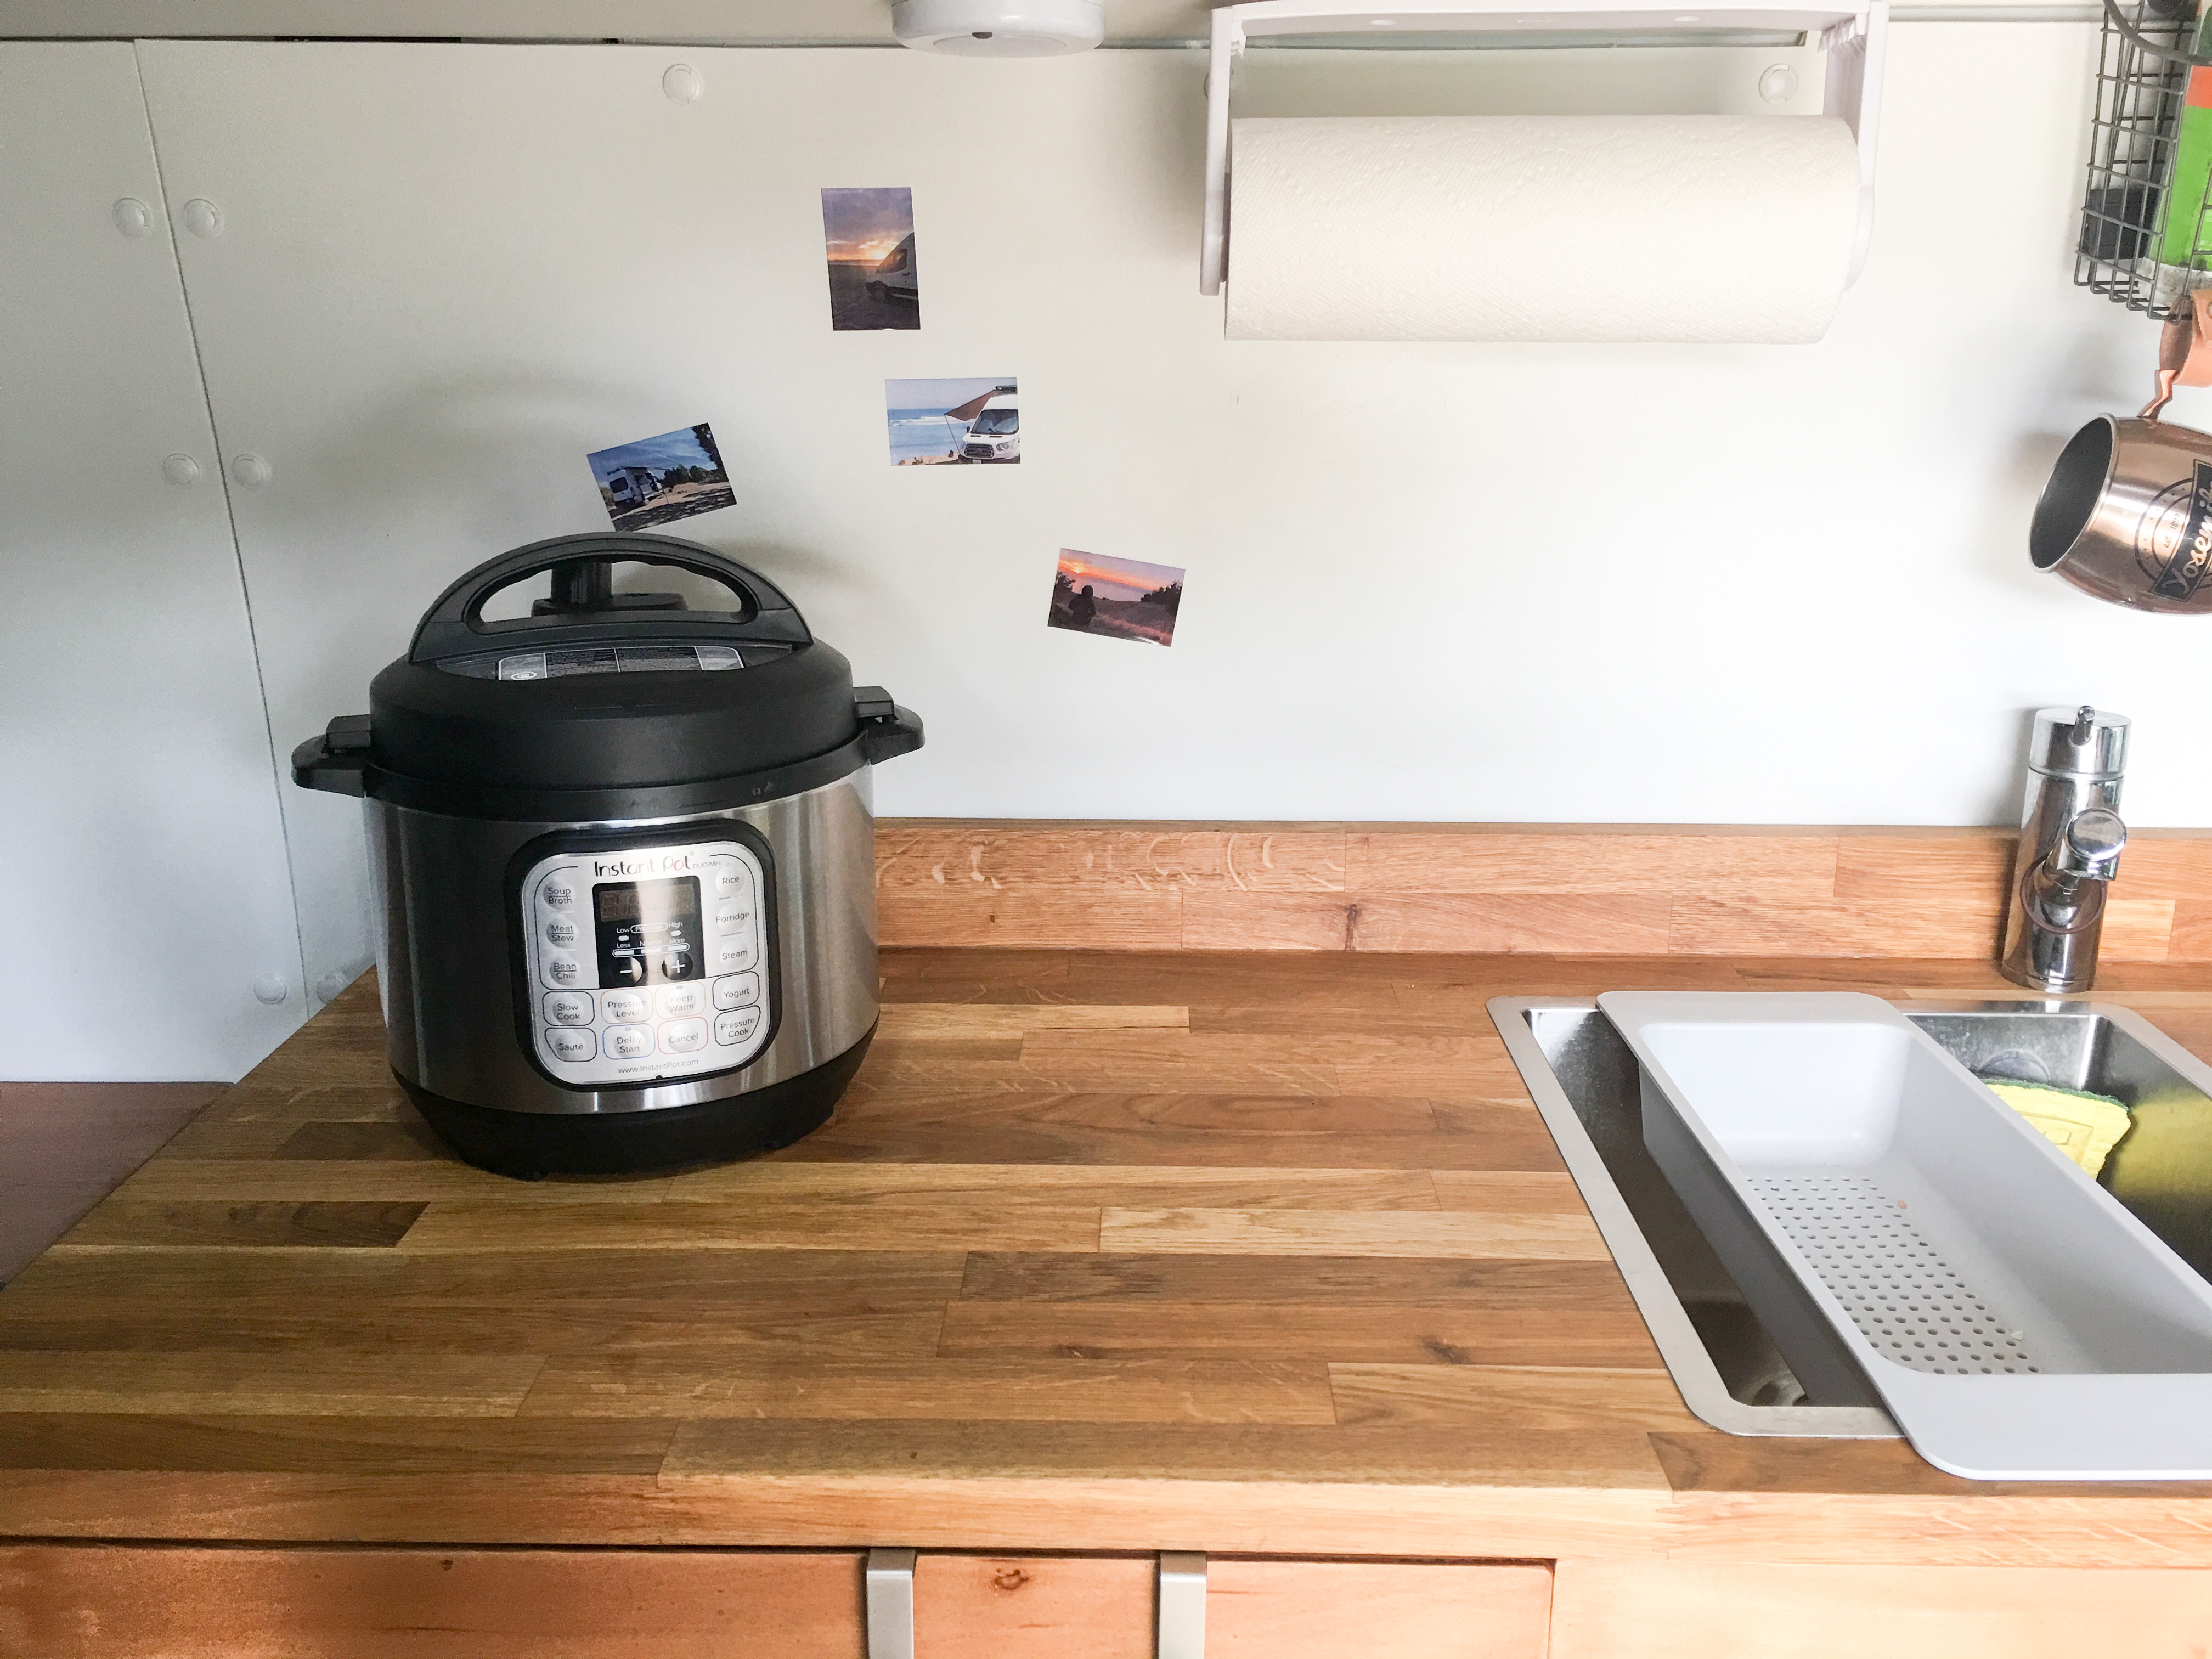

Van Cooking With An Instant Pot
So it is official, the Instant Pot is my new favorite van cooking appliance. Unless you have been living under a rock recently, you have probably heard some talk about the Instant Pot. Food bloggers are all about this multifunctional appliance. Numerous cookbooks are all over Amazon, I even saw a few the last time I went to Costco. Pressure cooking has become mainstream, thanks to this device.
The Instant Pot is numerous devices in 1. It can be used as a rice cooker, pressure cooker, slow cooker, steamer, sauté, yogurt maker, and food warmer. The mini size will make up to 6 cups (12 cups cooked) of rice at once, keep food warm for over 10 hours, and has a 24 hour delay start timer. Have I peaked your interest yet?


Adding Light Bars To The Roof Rack
Any respectable adventure van needs a light bar, it’s just a given. And now that Gidget has a rack to mount lights on there was nothing stopping it from happening.
There are some very expensive light bars out there and they are probably great but would be serious overkill for our needs. We just need a little extra light when traveling on dirt back roads, particularly in Baja.
So we found some affordable ones on Amazon that had decent reviews and so far we are very happy with them.
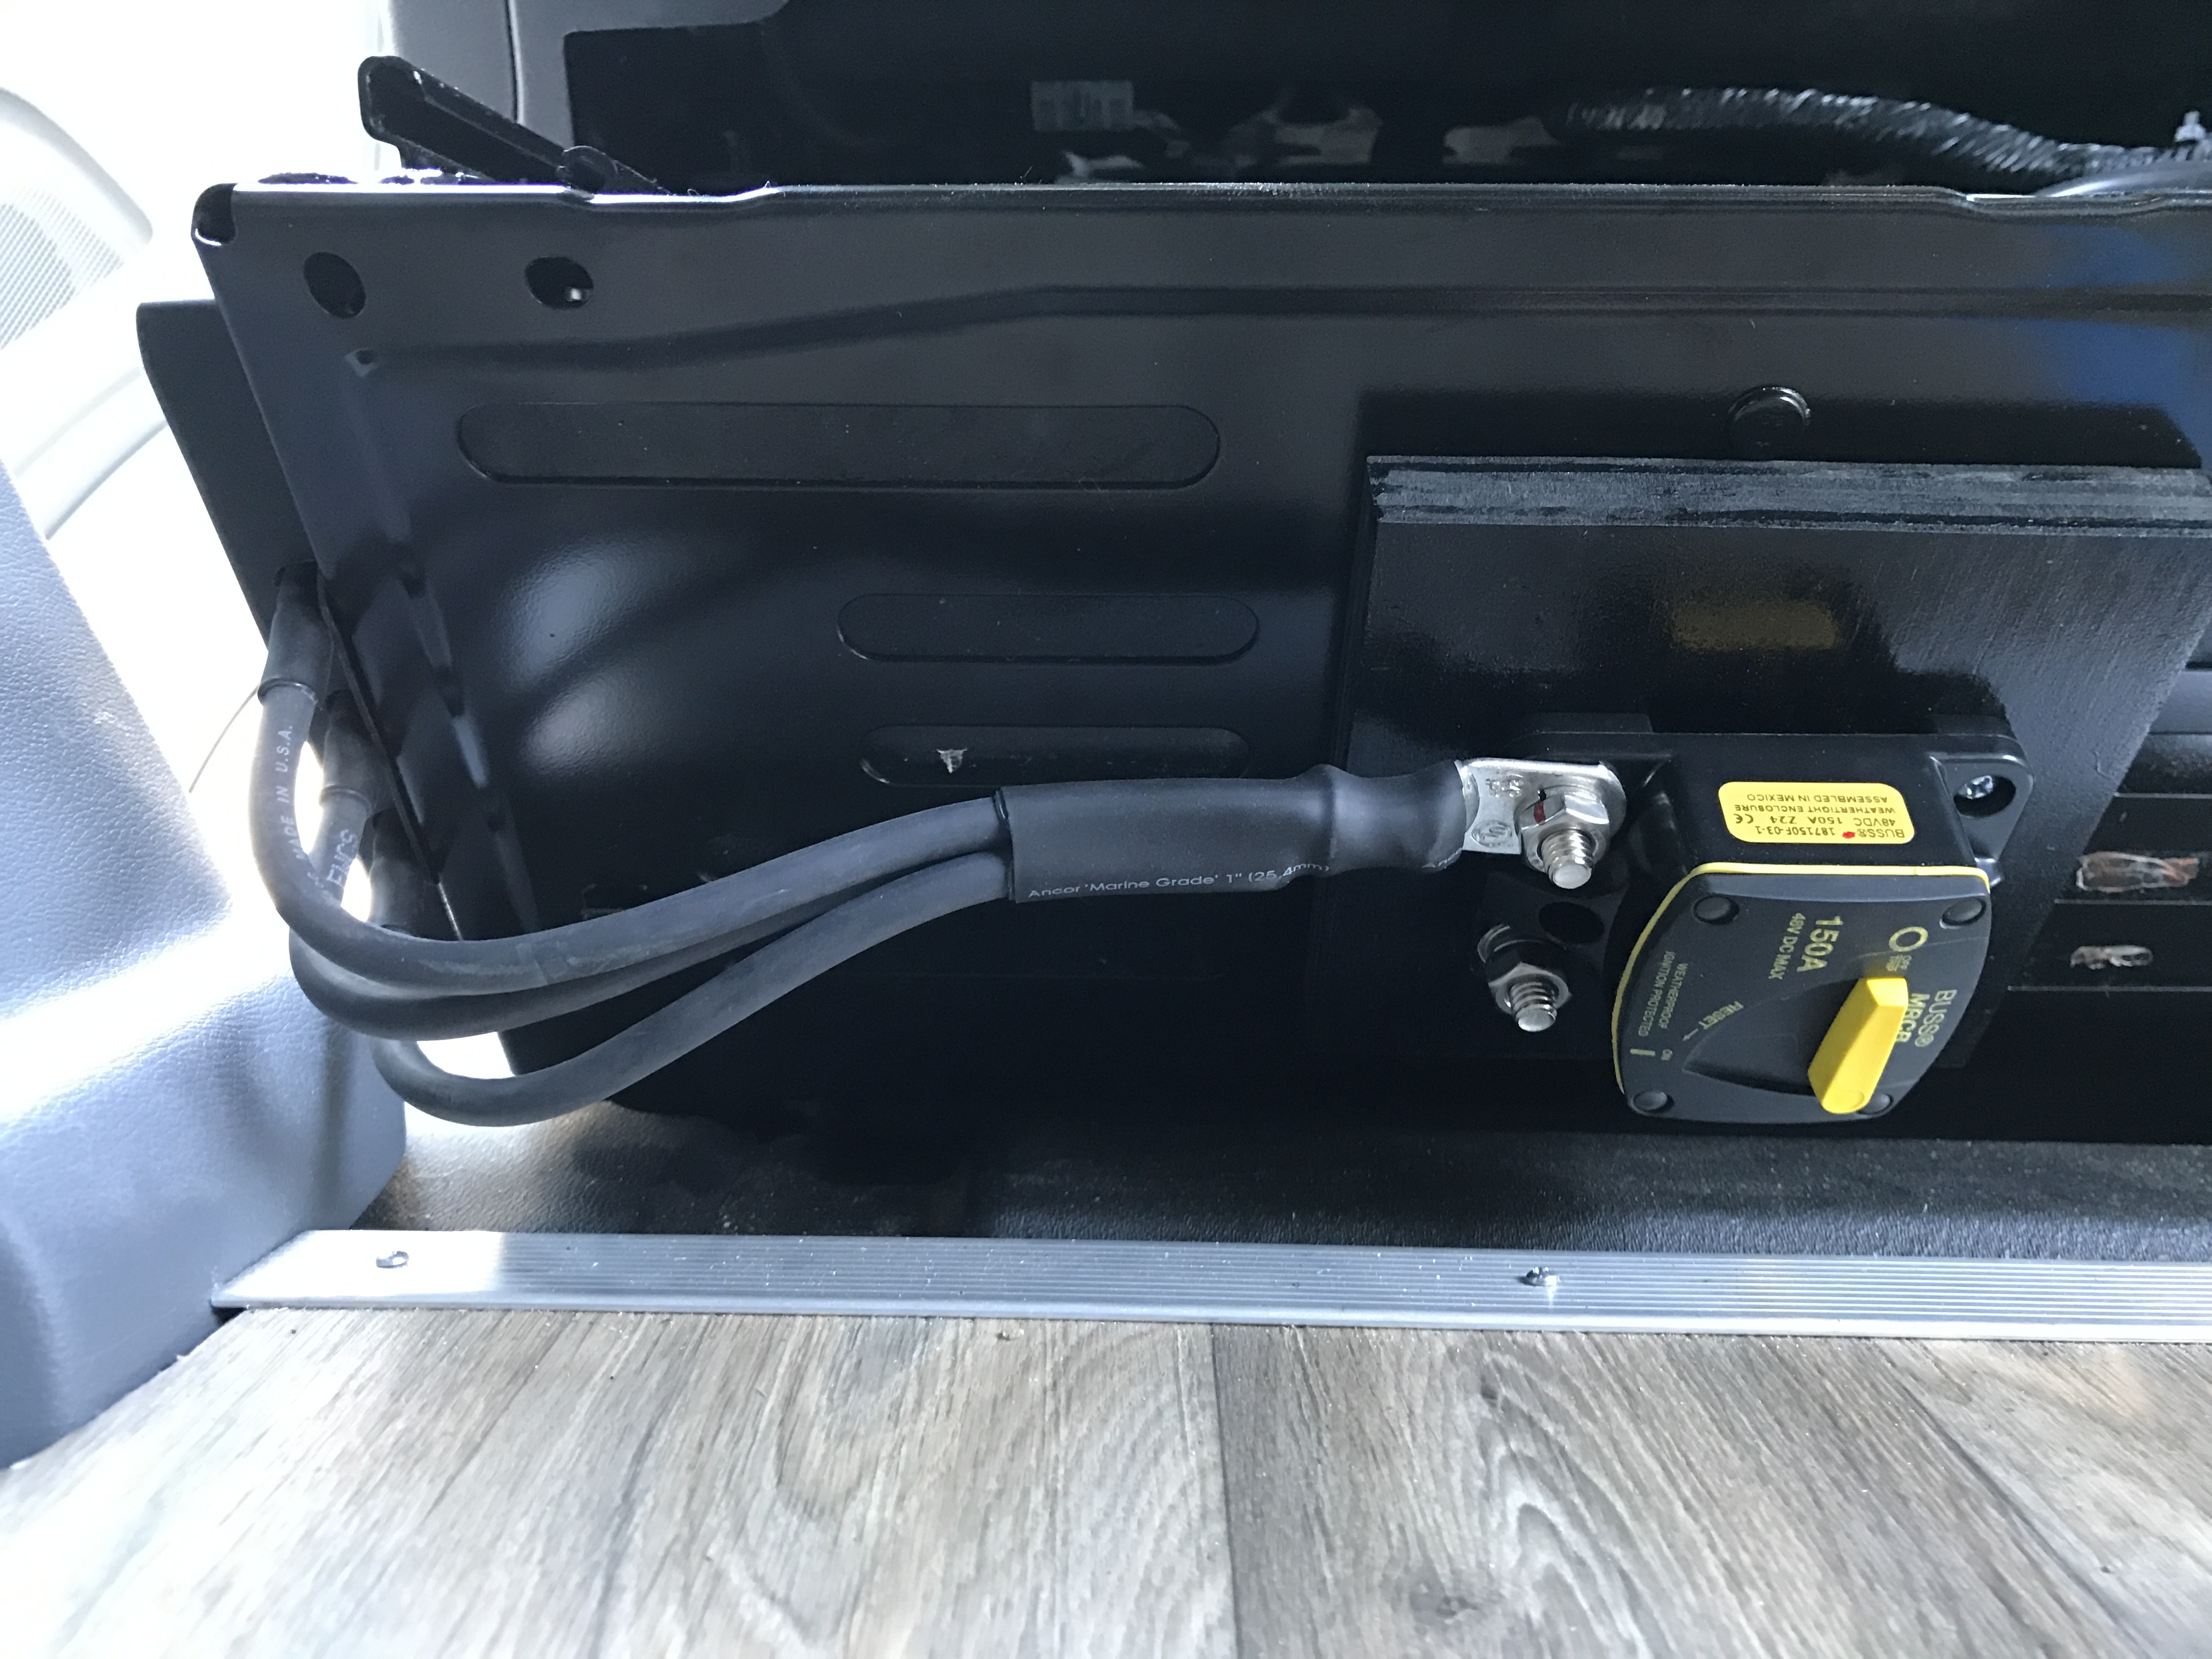

Ford Transit Customer Connection Points
Ford Transits come with 1 60A fused Customer Connection Points (CCP) as standard and up to 3x 60A may be fitted depending on vehicle configuration. If you are ordering a custom Transit you can get 3 CCPs by ordering the upfitter switches (option 67C).
If your Transit only has 1 CCP you can add the missing 2 by ordering kit part number BK2Z-14S411-A. CargoVanConversions has a good write up covering the installation process.
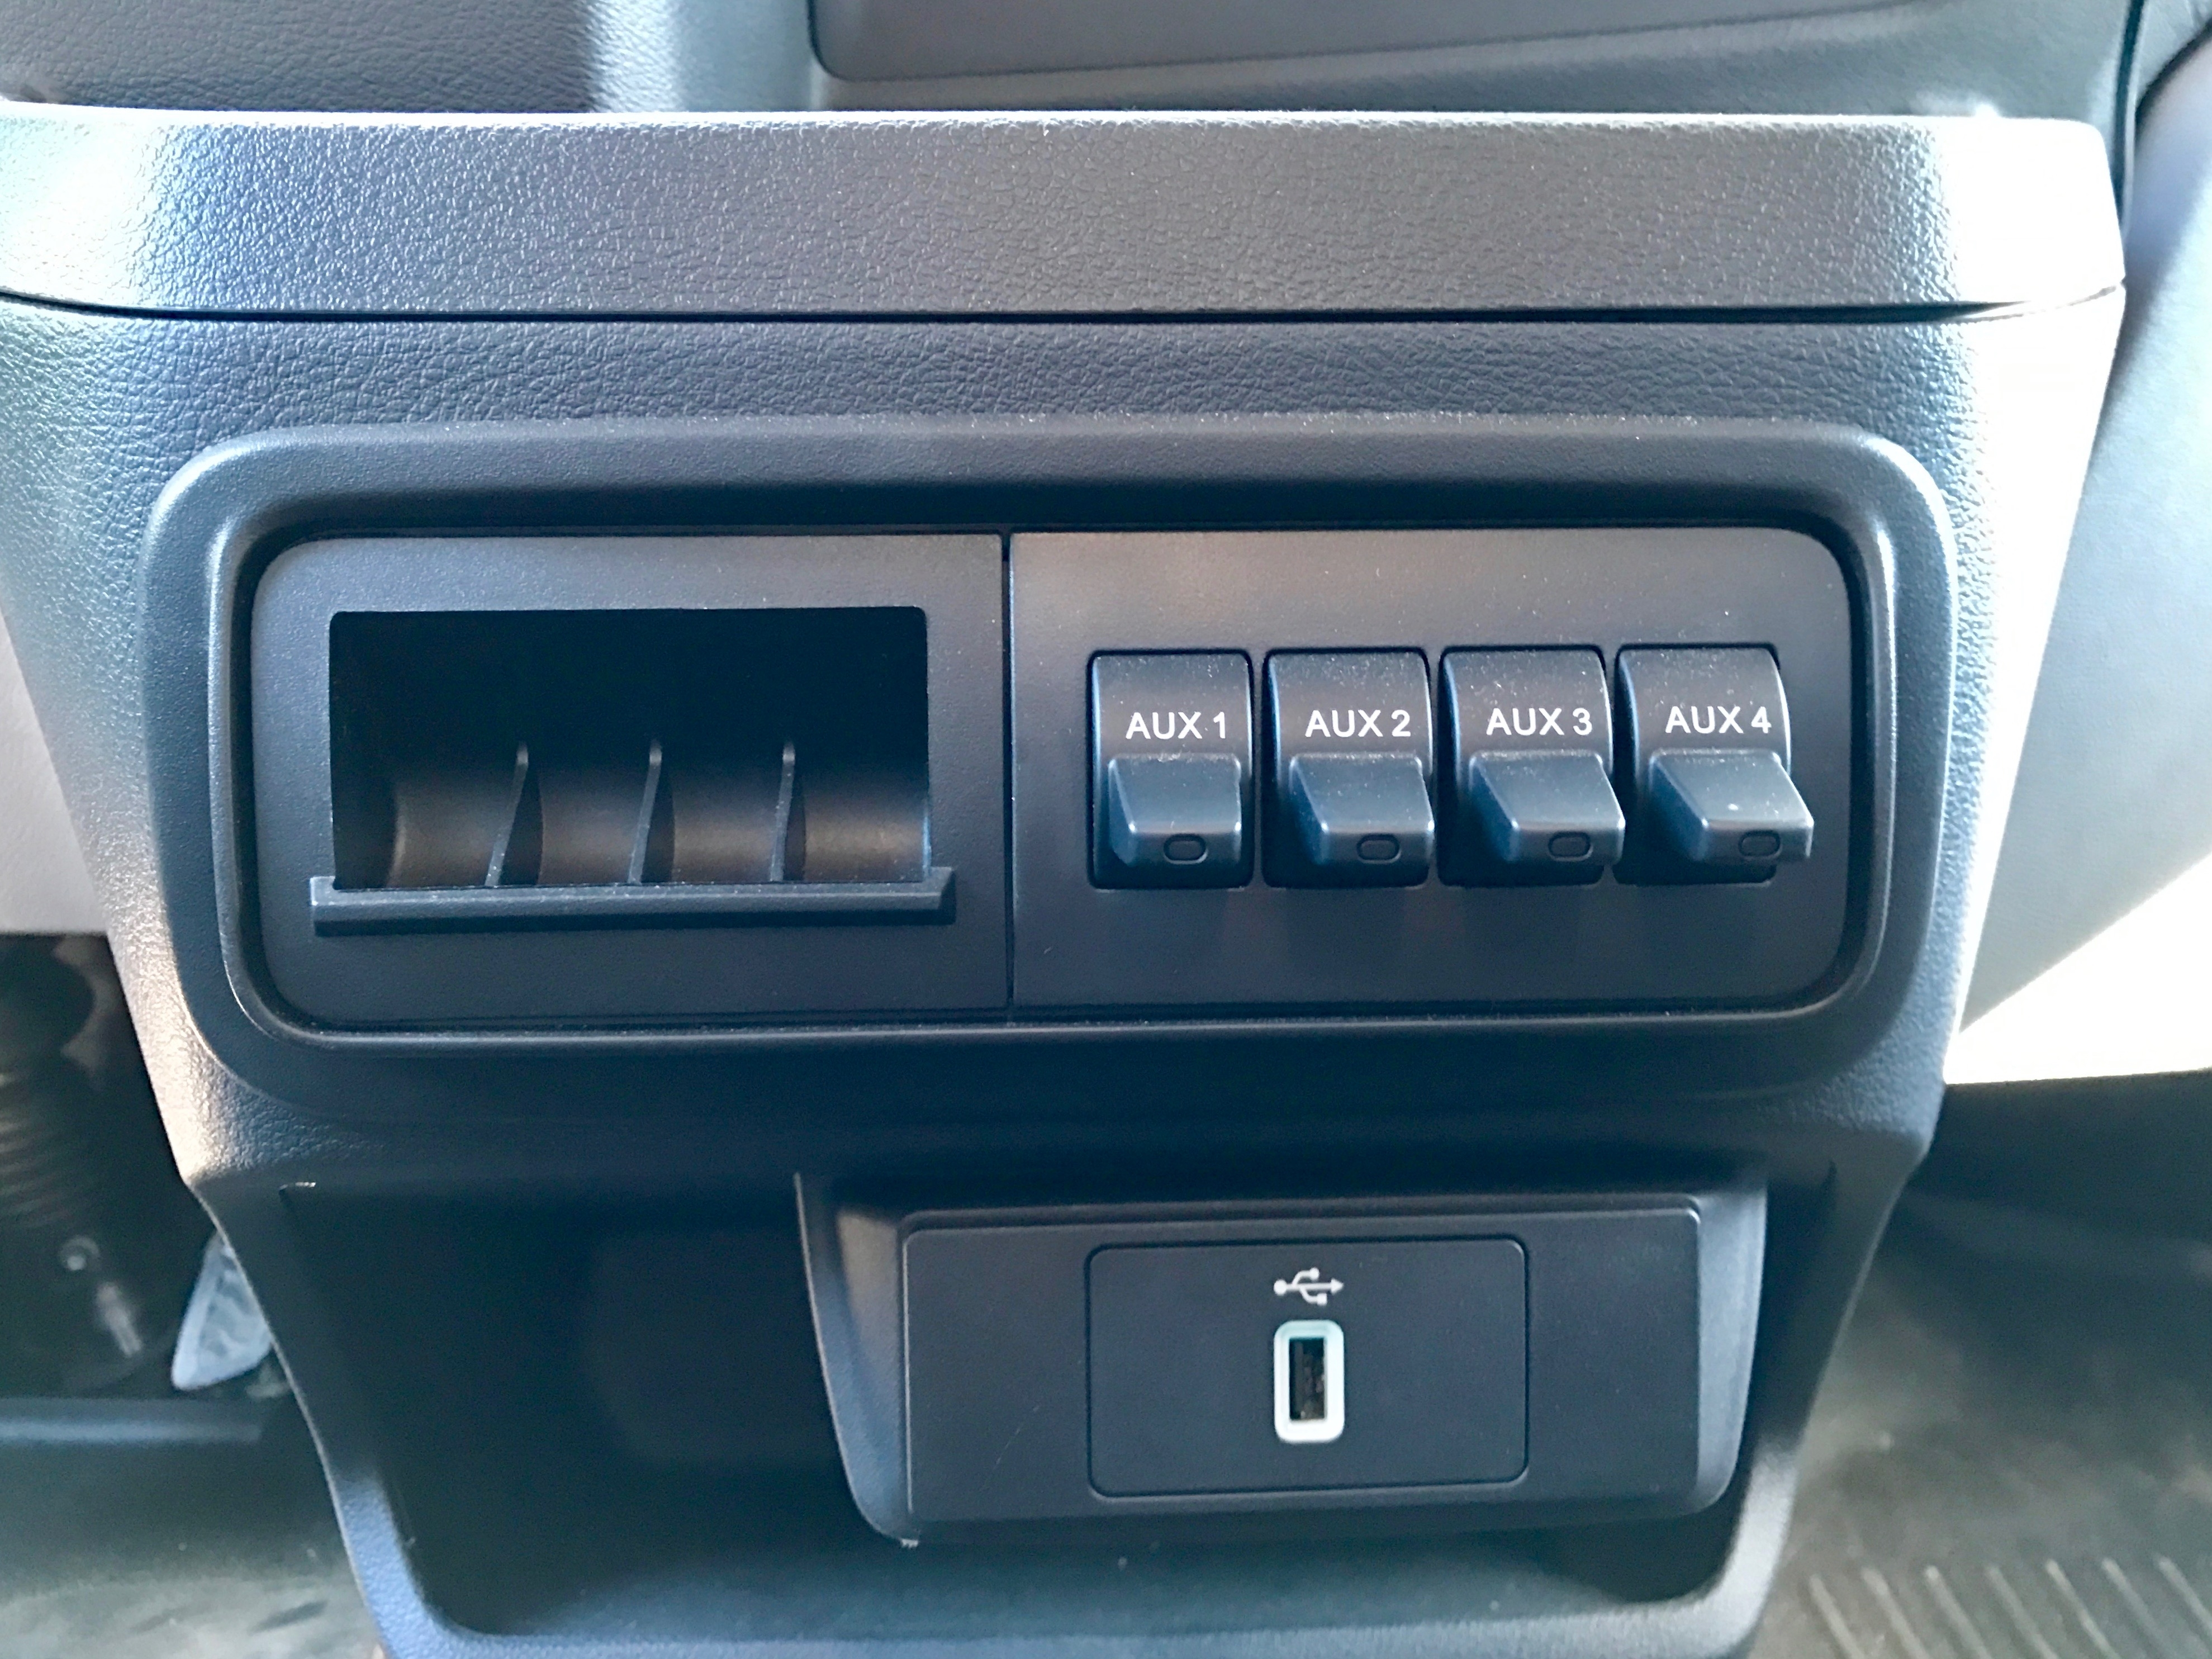

Ford Transit Upfitter Switches
When ordering a custom Ford Transit you can add Upfitter Switches, also called auxiliary or accessory switches. These switches allow you to control accessory items like lights, winches, or inverters with factory looking switches.
The switches are simple on/off style with an indicator light located in the center console between the driver and passenger seats. If the key is in the ignition or run position and the switches are turned on (flipped up), they provide a 12 V and 20 A max output.
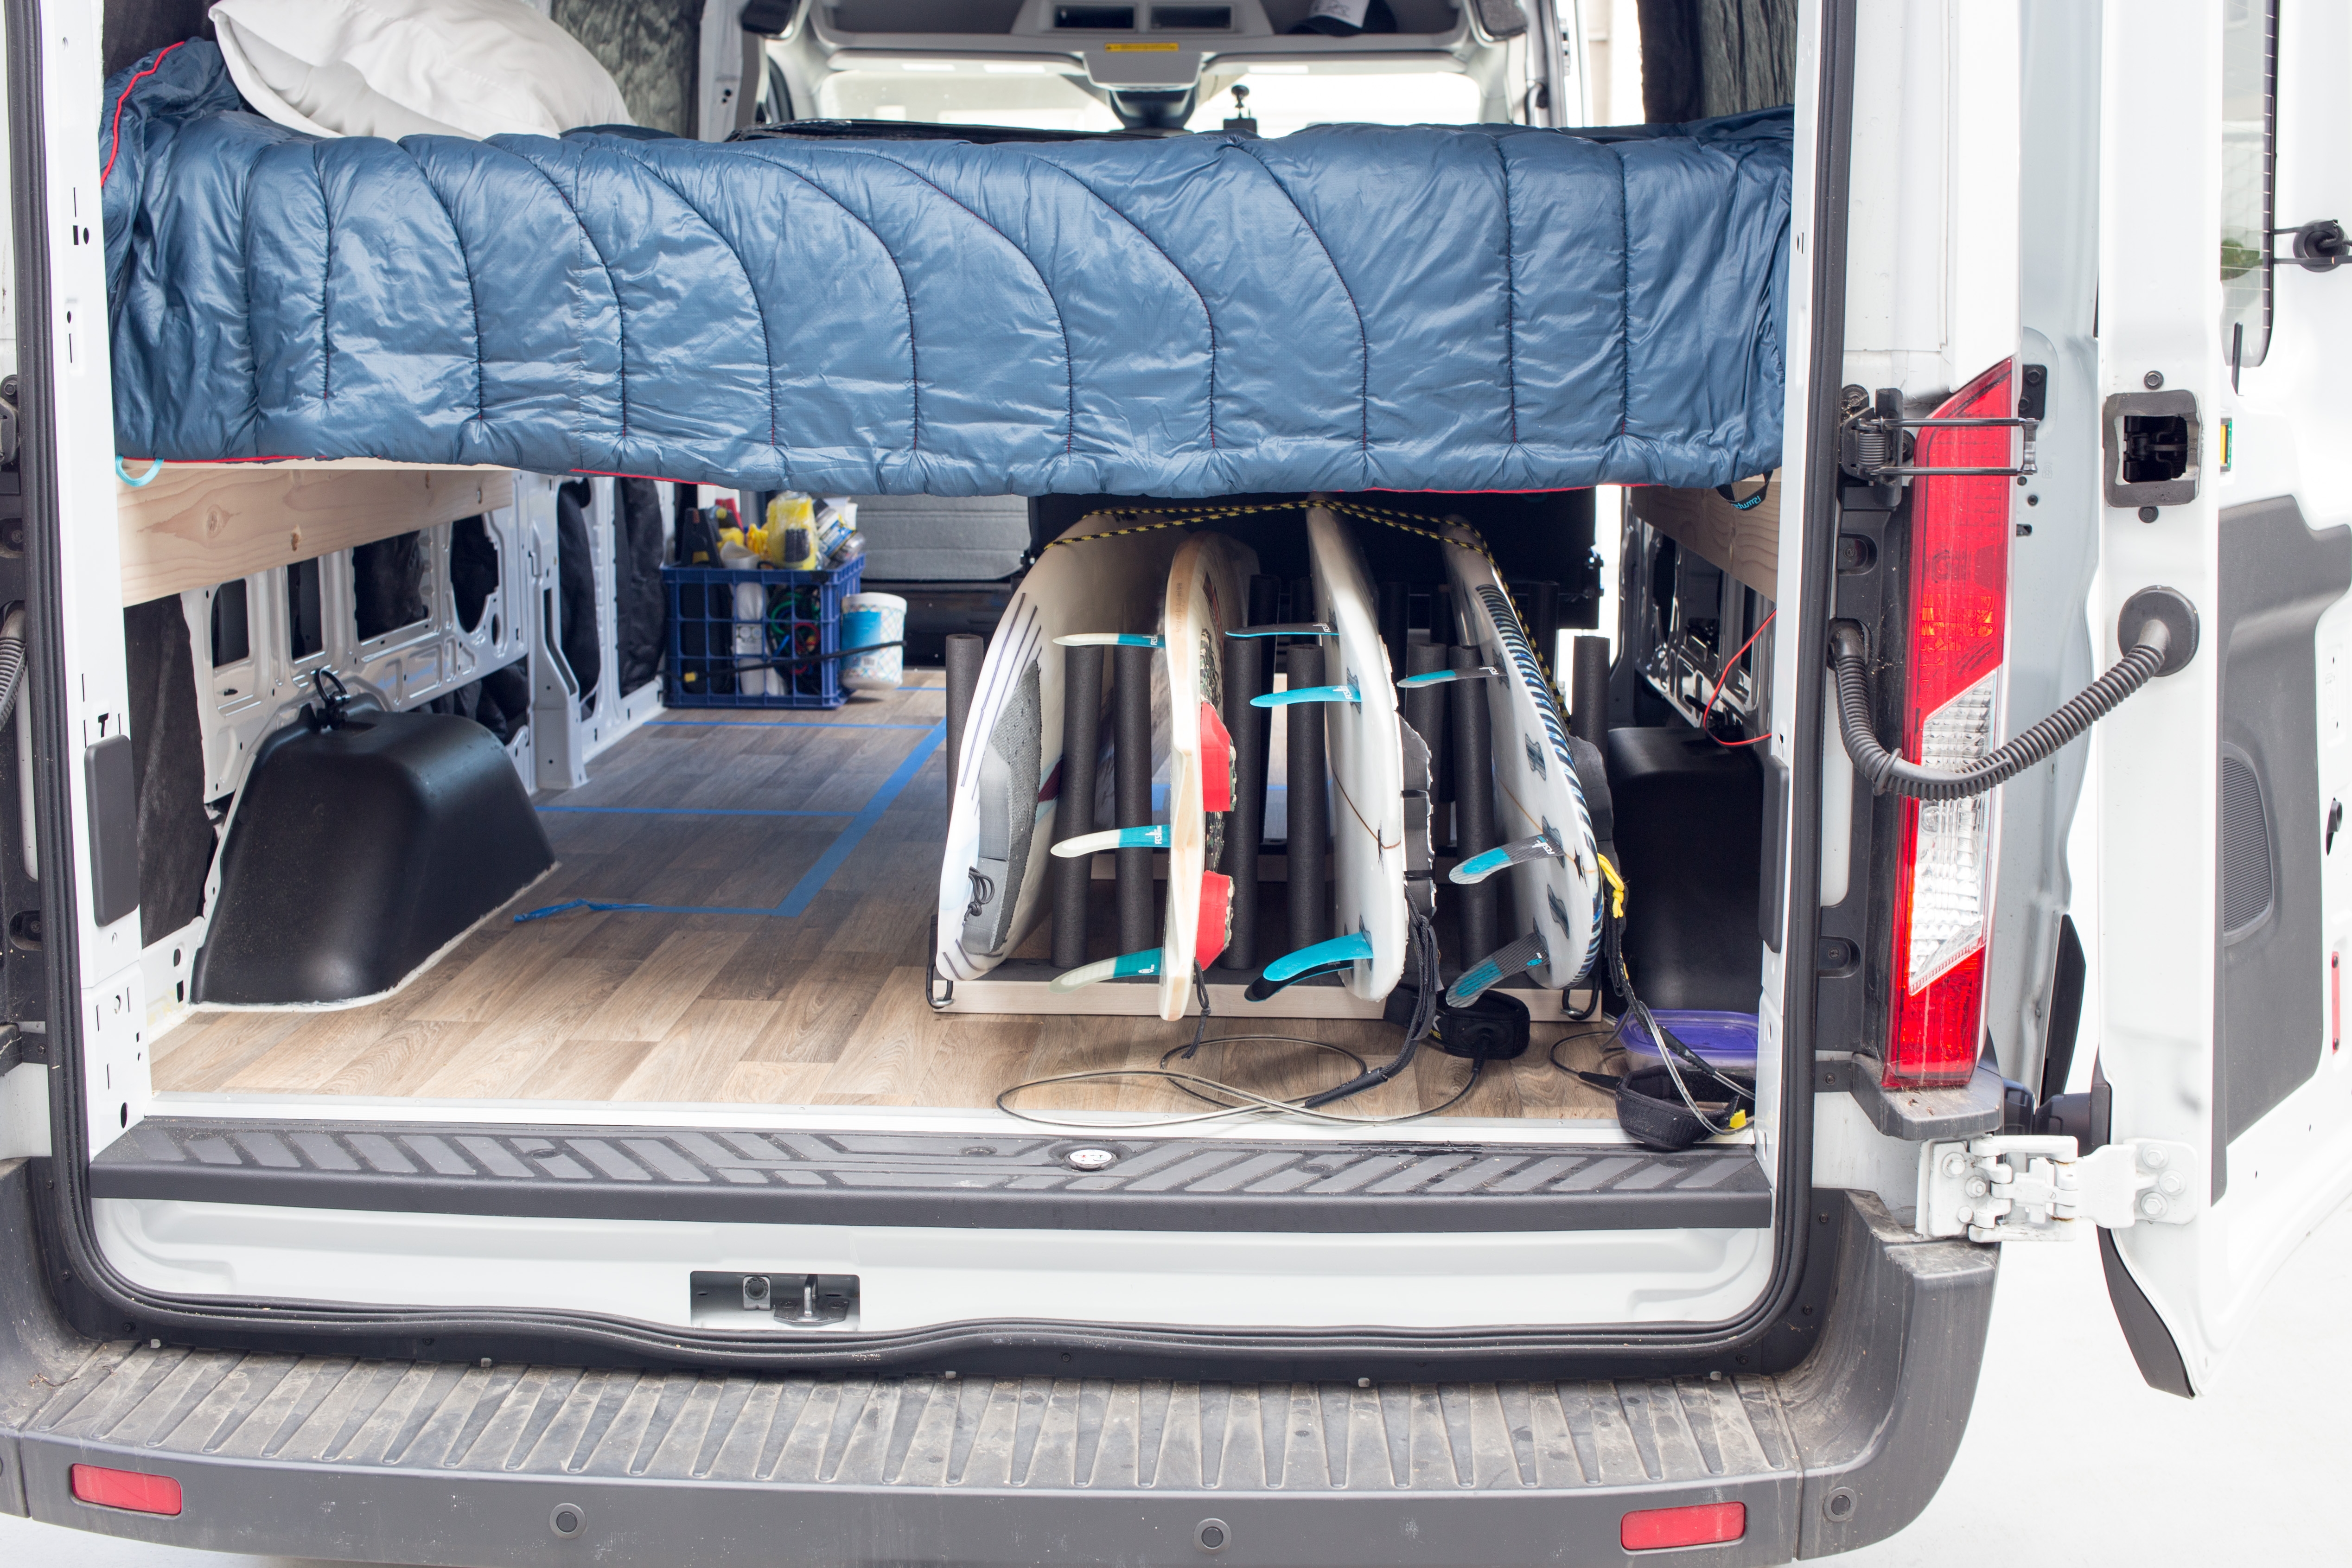

Build A Surfboard Rack For Your Van
Building a surfboard rack for your van allows you to pull up to your favorite break and pick the right board for the given conditions. It’s pretty awesome being able to do a surf check and have a large part of your quiver available.
After watching a couple Youtube videos it was pretty easy to come up with the plan for Gidget’s surfboard rack. It’s basically just your typical wall mounted rack, but mounted to the floor. The boards are being stored horizontally under the bed, so we created 2 racks to keep them in place.
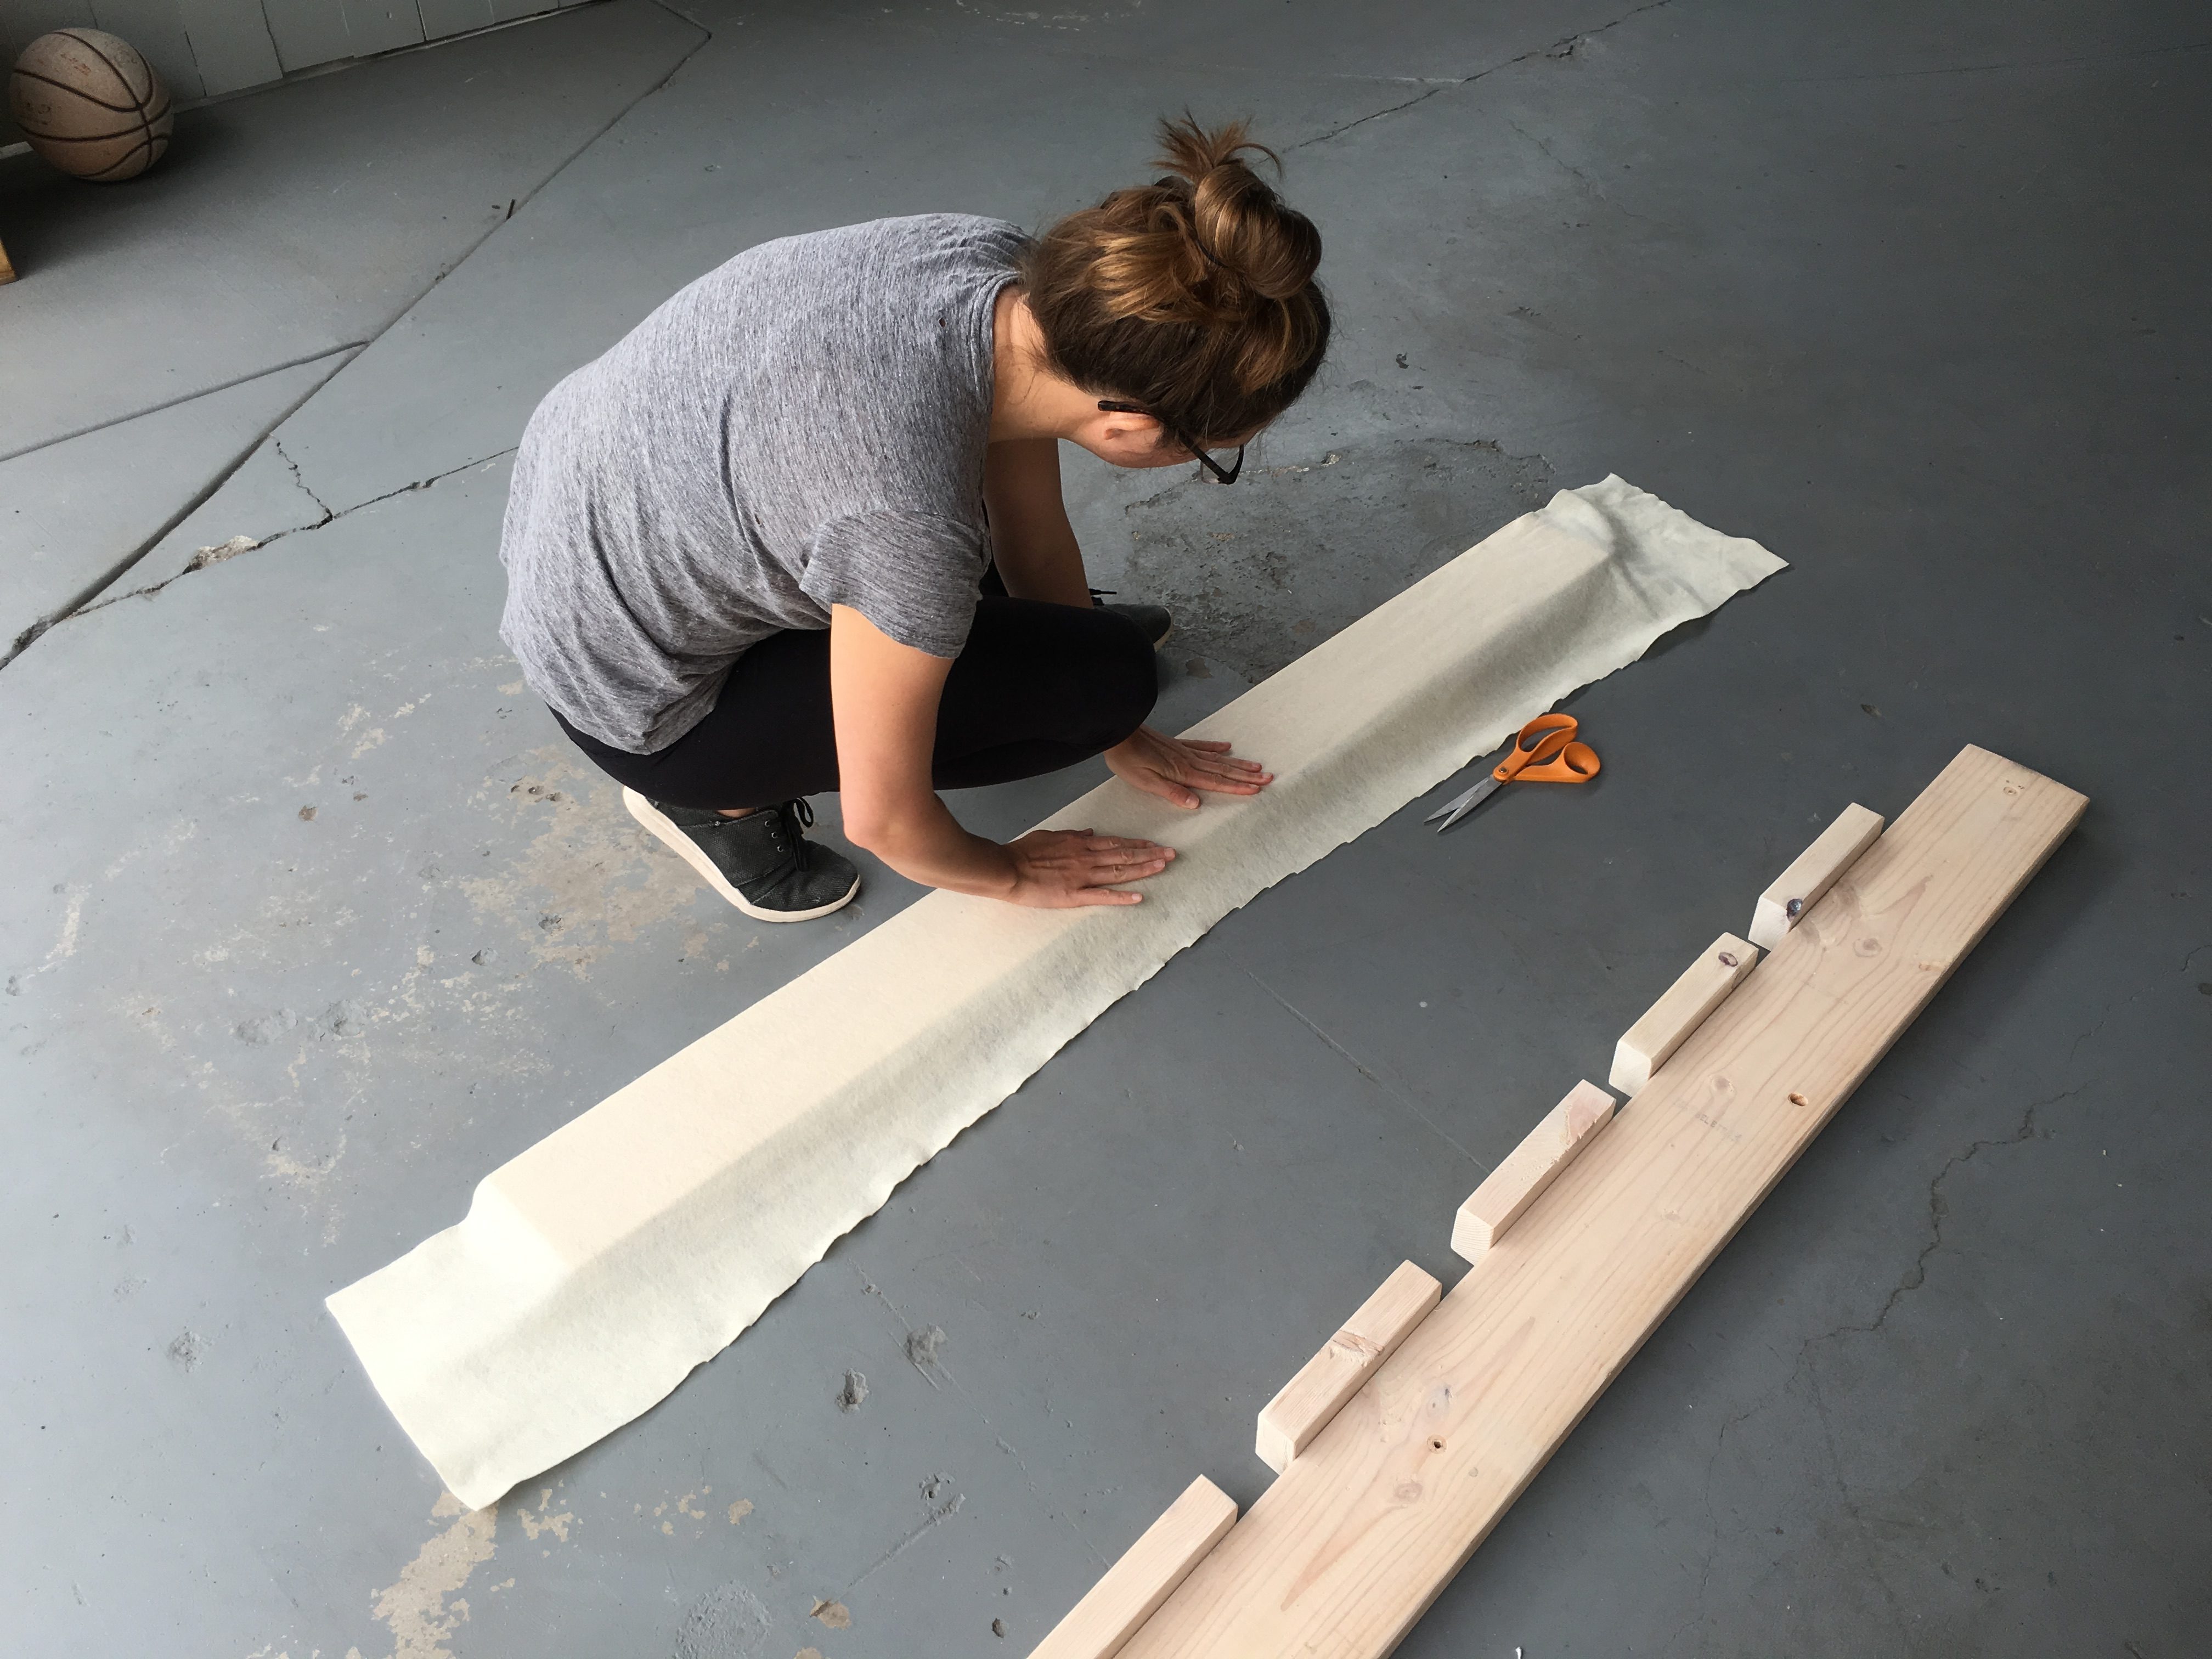

Creaks, Pops, Cracks, and Squeaks – Redoing The Bed
New creaks, pops, cracks, and squeaks are the last thing I want to hear while road testing a new addition to Gidget. We’re still early on in the conversion so any new noise we introduce is pretty noticeable and infuriating. When we added the bed a couple weeks back we wrote:
We are happy with how it turned out except when driving. Every little bump in the road results in a squeak. It kind of sounds like the metal is flexing where the wood attaches. Maybe we should have put something like felt in between the metal walls and the 2×6 wood? Or maybe we need to take some of the load off of the van walls with a support in the middle of the platform? We’re going to do some experiments to see if we can get the noise down.
After driving it around for a couple of weeks the squeaks reduced somewhat as everything settled but it was still pretty loud. After much debate we stopped being lazy and decided to disassemble the bed and do something about the noise.
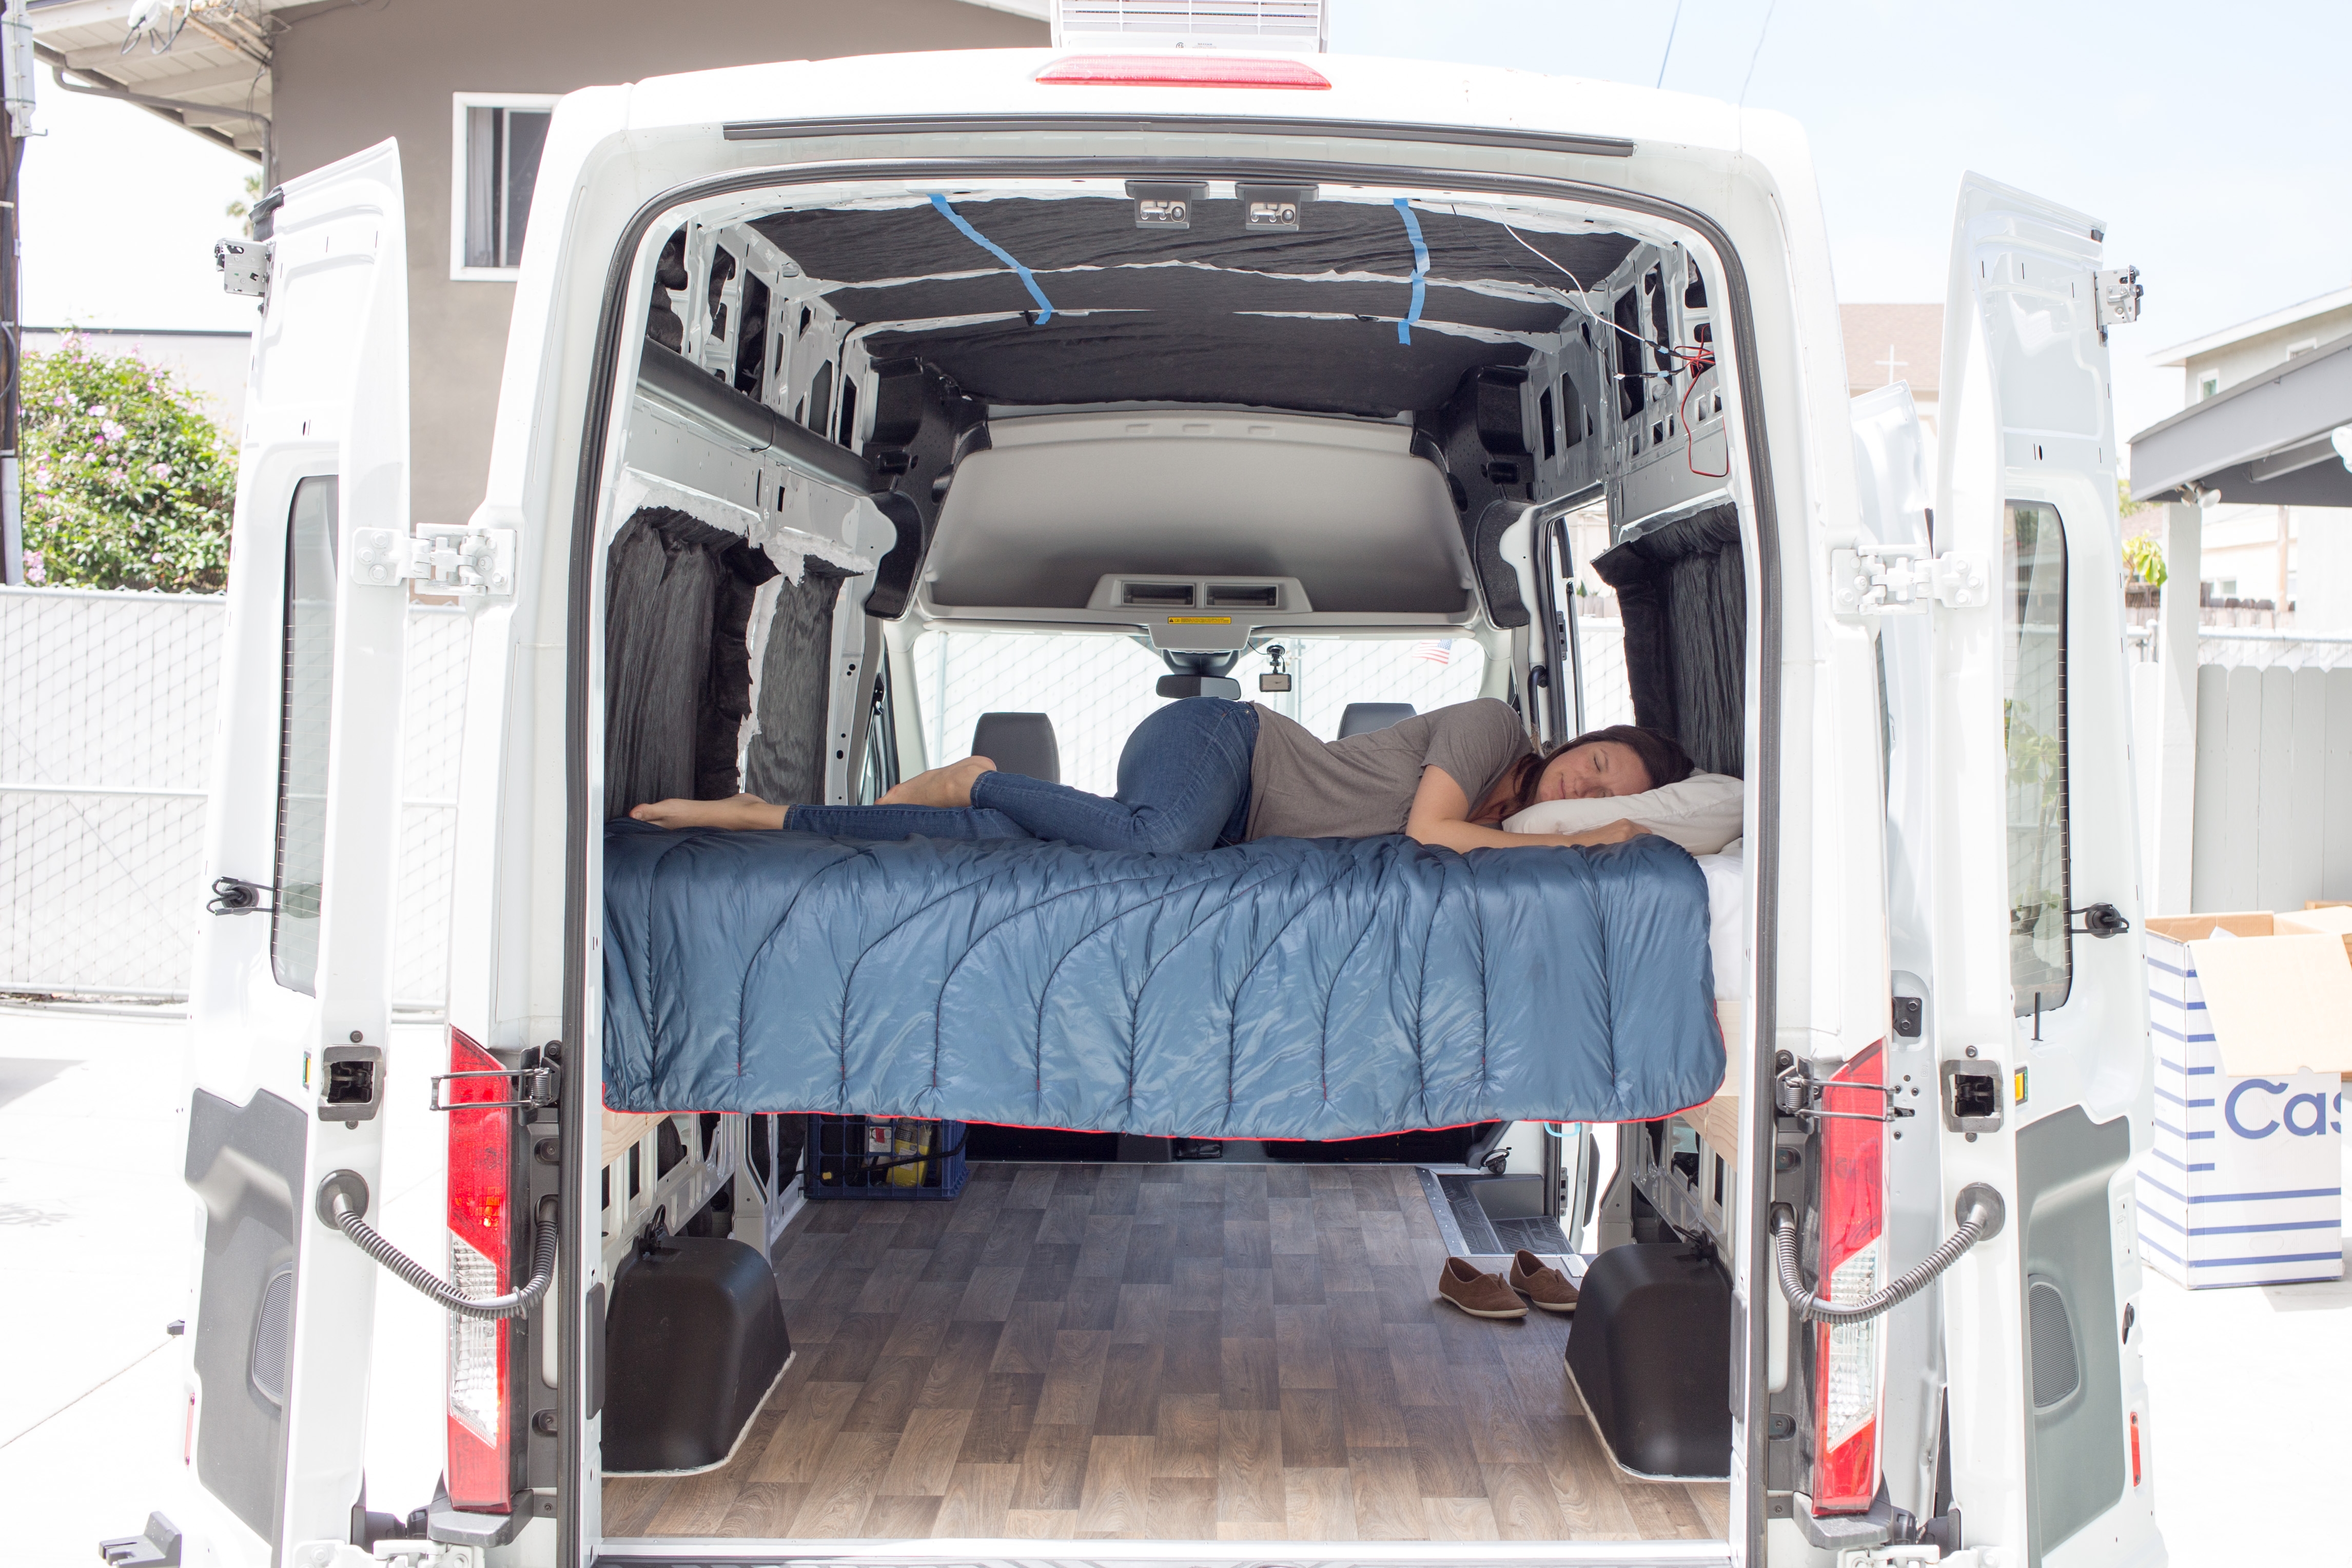

Adding A Bed To Gidget
When planning out our van build we knew we didn’t want to have to make the bed every night. We also wanted plenty of storage space under the bed and in overhead cabinets. A platform bed was really the only option.
To save space we decided to install it width wise in the back of the van. In the side cutouts of the van, there was exactly enough room to install a full size mattress.


How-To Install A Vinyl Floor In Your Van
We spent a couple days replacing the soft stock floor mat with a plywood and vinyl floor. The stock mat is not the best foundation to build a bed and cabinets on top of. And it doesn’t give you that cozy home feeling. Instead it gives off a work van vibe, not the killer adventure van feeling we want.
We went with a rather thin floor with minimal insulation so that the D-ring bolt holes are still usable.
